Showing posts with label Recipes. Show all posts

Sunday, August 25, 2013

Garlic marshmallows


We thought it would be fun to learn to make marshmallows. Then we thought it would be fun to make cool, fruity or hipster flavours of marshmallows. Then we thought ... garlic marshmallows! With some product development, these might be the next big thing at the Garlic Festival!

We used a standard marshmallow recipe: 4 Tbsp. gelatin, 3/4 + 3/4 cups water, 2 cups sugar, 1 Tbsp. corn syrup, 2 egg whites, and we puréed four cloves of roasted garlic into the water that we dissolved the gelatin in. 

They're ... well, they're marshmallows. They toast up beautifully. And they're quite palatable and tasty, in the way that you might agree that garlic ice cream (another novelty item that's been known to sell quite well around here on the 2nd weekend of September) is surprisingly yummy.  

They may or may not make it to market for 2014, but they've been enjoyed here on a touch-of-fall evening, the night before Erin leaves for Montreal.

Tuesday, December 04, 2012

Matcha White Chocolate Truffles

Matcha White Chocolate Truffles

1 lb. good white chocolate
1/2 cup butter
2/3 cup whipping cream
1/4 cup matcha powder

~ 1 lb. white chocolate chips or buttons for dipping

Melt and stir together the first four ingredients. Chill for several hours.

Roll into 1 tsp. balls, dip in melted plain white chocolate. Store in airtight containers in a cool location, well away from dog.

Note: Sophie describes the above recipe as Matcha Truffles: Extreme Edition. Unless you really love green tea, you might want to tone this down. Start with a couple of tablespoons of matcha powder and work up from there to taste. We decided that wrapping a bit of the truffle ganache around a macadamia nut balances the flavour beautifully, so that the extreme mix works well.


Tuesday, August 21, 2012

Thermos hack: yogurt-maker

I have a large plastic thermos, and inexpensive item that is world-weary and not particularly water-tight. It has a capacity of about 3 Litres, and is perfect for making a large batch of yogurt for our family. Since we've been freezing the local summer fruit bounty, the kids are making a lot of smoothies and subsequently we go through a lot of yogurt. This is so cheap and easy.

A Thicker Yogurt

4 cups boiled water
4 cups tap water
4 2/3 cups instant skim milk powder
1/2 cup fresh yogourt with active bacterial culture, or two packets of yogourt starter

Combine boiled and tap water in a large thermos. In my house the resulting temperature is about 115ºF, which is ideal for starting a yogourt fermentation. I can trust this temperature, but if you're trying this for the first time, definitely check the temperature of the mixture and adjust as necessary. Whisk in skim milk powder, then whisk in the fresh yogurt. Using skim milk powder allows you to get a thicker yogurt by getting more milk solids in less liquid volume, and it means you don't have to go the fussy process of heating the milk to kill any lingering thermophils.

Place lid on thermos. Place in unheated oven with the light turned on to provide a bit of warmth. Leave undisturbed for 8 hours. (Put a sticky-note on the oven to remind yourself and others not to turn it on! Ask me why my thermos is world-weary with bubbly plastic on the bottom...) With luck you should have a nice thick yogurt. It will firm up a bit more in the fridge.

Yield: 8.5 cups of yogurt

Tuesday, July 24, 2012

Sushi salad

New favourite thing at our place. Keeps better than sushi, and it's much easier to make.

Sushi Salad

2 cups uncooked rice
1 English cucumber, sliced and quartered
3 medium carrots, thinly sliced
1/2 red onion, thinly sliced and chopped
3 Tbsp. chopped pickled ginger
3/4 cup rice wine vinegar
2 Tbsp. vegetable oil
4 Tbsp. sugar
2 tsp. salt

Cook the rice in 3 cups of water. Any sort of rice will do. We actually prefer not to use sushi rice, which sticks together so well when rolling sushi, because we want a stir-able salad which doesn't clump up. We use a lovely fragrant basmati. Bring to boil, turn to low, cover and simmer 20 minutes (or 40 minutes if using brown rice). Remove from heat, fluff with fork, leave to cool.

Prepare the vegetables and ginger.

Once the rice has cooled a bit, dump it into a bowl and fluff it some more to keep the grains from clumping too much and to speed the cooling.

Mix together rice wine vinegar, vegetable oil, sugar and salt to make the "dressing."

Once rice has fully cooled, toss in the vegetables and douse with the dressing.

Serve immediately or cover and save in the fridge for up to 3 days. The vegetables will wilt slightly but the salad remains delicious.

Friday, May 25, 2012

Dandelion syrup

About 6-8 cups of dandelion flowers yielded about 1 cup of packed yellow petals. We mixed this with 2 cups of sugar and 2 cups of water, brought to a simmer and allowed to cook for an hour or so, gradually reducing in volume to a syrupy consistency. Then we added the juice of one small lemon, strained out the petals, and cooled.

It tastes wonderful! Like spring sunshine mixed with honey and lemon. Delicious on ice cream.

Saturday, January 28, 2012

Best Pizza

 We make pizza almost once a week around here. It's a flexible go-to meal for us. So long as someone takes ten minutes to get the dough started sometime between 2:30 and 4:30 pm, it's a quick and easy meal that we can all pitch in to get made in less than half an hour (plus baking time).

Over the years our toppings have gone through many evolutionary steps. There were the early years when certain kids would not eat anything that wasn't approximately white, so we'd cook one pizza with only cheese, just a molecular layer of marinara sauce, and sometimes a sprinkling of corn kernels. There were the years none of the kids would eat mushrooms, or olives, or peppers ... and so we made one of two pizzas with those things omitted. And then when we had a mix of vegetarians and carnivores, we would have a veggie pizza and one with half meat.

Now with more mature tastes and the demise of our vegetarian ways, anything goes. And this week we adapted one of our favourite panini recipes to the top of one of our pizzas. (The panini omits the marinara sauce and mozzarella cheeses.) The pizza toppings are:

  • caramelized onions with a sprinkling of balsamic vinegar, 
  • chopped dried figs, 
  • spicy beef or pork sausage of some sort, 
  • fresh spinach and 
  • a sparing mix of cow mozzarella and goat chèvre cheeses. 

1-1-1-1-1-Enough Pizza Dough
1 cup lukewarm water
1 Tbsp. sugar
1 Tbsp. olive oil
1 tsp. salt
1 tsp. instant yeast
enough flour to make a just-barely-no-longer-sticky dough

Mix, adding flour gradually. Stand mixer with dough hook makes it easy. Allow to rise covered in a warm place until doubled. Punch down, roll/throw/stretch out. Makes enough dough for one 16" pizza.

Sunday, October 16, 2011

Chemistry around here

Lye + water + oil = soap

Fiona would like to be a chemist, or so she thinks. Until we get to the chemistry section in her science course, we're having fun little forays into the world of household chemistry.

We had fun making soap a couple of weeks ago. We used a combination of sweet almond oil, olive oil and coconut oil, and a great on-line lye calculator. We weighed things out with our digital kitchen scale (love that thing!) and got a mixture that was accurate and reliable. Much better than the guess-work I'd been used to from my previous soap-making forays.

We added some rosemary and lavender, and essential oils of each, plus a little green soap dye. It smells lovely and we are patiently waiting for it to cure whilst testing out little scraps from time to time. It lathers beautifully.

Sugar syrup + baking soda = foam

Today we made sponge toffee. I hadn't done this in years and had mistakenly thought it was a acid-base reaction with the baking soda which was responsible for all the bubbles. In fact the baking soda remains inert and simply acts as an nidus for bubble formation in the boiling syrup. There's no acid involved at all: just the thermal decomposition of sodium bicarbonate.

We made our sponge toffee with a bit of butter rum flavouring left over from Sophie's summer hard candy business and it tastes fabulous. Our digital infrared thermometer made easy work of the syrup boiling. Again, good tools make such a difference!

Sponge Toffee


2 1/2 cups sugar
2/3 cup corn syrup
90 ml water
2 tsp. vanilla extract
1/2 tsp. butter rum flavour (optional)
2 tsp. sifted baking soda

Line a 9x13" pan with foil and brush foil with oil or butter. Mix sugar, corn syrup and water in a large heavy saucepan. Bring gradually to a boil. Cover with tight lid for 5 minutes to dissolve any sugar crystals that may be adhering to the sides of the saucepan. Remove lid and continue boiling, checking temperature frequently. Once syrup has reached 300ºF, remove from heat. Stir in flavouring(s). Whisk in baking soda and quickly pour into prepared pan. Allow to cool to room temperature. Remove foil and break apart, consuming ad lib.


Brown pickle


I tweak this recipe every time I make it, but always forget what changes I make. This year I've written it down, because it has turned out especially well.


Brown Pickle

10 oz. carrots
10 oz. prune plums
2 large tart apples
1/2 large rutabaga
1 medium zucchini
4 onions
6 cloves garlic
1/2 large head cauliflower
5 oz. dates
25 small gherkins
1 Tbsp. browning (optional)
1 Tbsp. tamarind concentrate (or 1/4 cup lemon juice)
1 Tbsp. worcestershire sauce
1 tsp. salt
2 tsp. allspice
2 tsp. mustard seeds
1 tsp. cayenne
500 ml malt vinegar
2 1/2 cups sugar
1/2 cup molasses

Finely dice all vegetables. Place in large heavy saucepan or stock pot with remaining ingredients. Bring to boil and simmer gently for 2-4 hours, until vegetables are soft and desired level of browning has been achieved.

Ladle into hot jars to within 1/2" of top and process in hot water bath for 15 minutes for half-pint jars, 20 minutes for pints. Yield: about 3 Litres.

I love this stuff. It's a pretty good knock-off of Branston Pickle, which sells for about $6 for a 250 ml jar here in Canada. I put it on crackers, or spread it in sandwiches or (dare I confess?) eat little scoops of it with a spoon. It's also good as a side relish with cold meats (a.k.a. ploughman's lunch).

Even better: the kids in our family don't think much of sweet pickles and therefore most of the eating falls to the grown-ups.

Thursday, September 01, 2011

End of the season

Tomorrow will be the girls' last market. School and travel and fall activities begin next week and will conflict with marketeering. Fiona managed to package up all but these little bits of tea for tomorrow and hopes to sell off almost all of her stock -- though I'm sure we will manage to enjoy whatever is left over!

She and I had been experimenting with dried peaches and walnuts for a while and this week we finally hit on a blend that we all really like:

Okanagan Orchard Tea

4 parts white peony tea leaves
2 parts crushed dried peach slices
2 parts toasted walnut pieces
1 part crushed cinnamon sticks

It's a warming tea that reminds you of summer while taking the edge off chilly mornings or evenings. It will be the grand finale tea for the end of the her very successful summer as an entrepreneur.

Wednesday, July 27, 2011

Kids cooking

Last night Sophie made us Enchanted Broccoli Forest for supper. I am greatly enjoying the girls' enthusiasm for meal preparation. And, although I am not much of a pie person, I am really looking forward to the cherry pie she made for dessert tonight. She has ventured into the art of pastry-making with this. I'm no expert, so she was pretty much on her own. It certaintly looks lovely! And she is thrilled.

Fiona is making supper tonight. She'll be making us a mega-platter of nachos. Corn chips with shredded Tex-Mex cheese melted on top, and sides of refritos, pico de gallo, tomato-based salsa, sour cream with her home-grown chives, and cheddar-chipotle dip. It's a light family meal we have fairly regularly and all enjoy. Well, except for Erin. All the more reason to make it now, while she's away living off coffee, cereal bars and occasional hospitality spreads on tour with the NYO.

We loved the Cheddar-Chipotle dip we got in Calgary once and made our own version. It's become a favourite at our house. Here's our version of the recipe. We use chipotles tinned in adobo sauce and the leftovers keep well in the fridge. Super easy and super delicious.

Chipotle Cheddar Dip

1 1/2 cup mayonnaise
3/4 cup sour cream
1 whole chipotle pepper, finely chopped (more to taste)
1-2 tsp. of the adobo sauce the tinned chipotles come packed in
2 Tbsp. onion flakes
3/4 cup packed shredded-and-chopped aged cheddar cheese
1/4 cup chopped cilantro

Mix all ingredients in a bowl and allow flavours to meld for at least an hour before serving. Great as a nacho sauce, vegetable dip or cracker spread. Also great as a sandwich spread.

Thursday, June 30, 2011

New tea, new candy

When you have a lot of rhubarb in the garden, and strawberries are coming into season, and red clover is overflowing the waysides, and you're an 8-year-old looking for inspiration for a new tea blend, the colours of your inspiration are pink and green.

I truly love this tea. We found some bulk organic white peony tea, fair trade and imported in small quantities by a Chinese woman in the area. Fiona and I chopped strawberries and rhubarb, dried them on the dehydrator, picked a couple of litres of red clover heads and lightly dried them. Mixed this all together and voilà, a beautiful blend full of the colours and flavours of spring. We used roughly equal volumes of each component, so that makes it easy to reproduce if you'd like to make your own. I expect any fresh green or white loose leaf tea would work just as well as the white peony. Fiona has packaged up a dozen bags of it to sell at the market tomorrow. It will be her "Featured Tea of the Week," and samples will be available if you're interesting in dropping by her stall.

Brewed up it's yellow with a touch of ruddiness. It is absolutely wonderful with a little dollop of honey mixed in. I expect it will be great iced as well. This is definitely a tea that I'm going to mix up a couple hundred grams of and mark "Not for sale" and tuck in my cupboard for my personal use in the middle of winter. Fiona calls it Pink Paradise. In February it will reassure me that spring will come again.

Sophie received a couple of books on candy-making in the mail yesterday. She's all inspired to make marzipan bumblebees, violet velvets, blackberry paste and crystallized rose petals. This book is amazing: great pictures and the recipes use real ingredients. The raspberry lollipop recipe starts with sugar and raspberries; the caramel apple recipe makes absolutely no mention of Kraft products in any way, shape or form. I'm looking forward to her explorations!

Wednesday, June 29, 2011

Veggie Pâté

Veggie pâté has become popular around here. It's so simple to make, and it adds substantiveness and protein to summer sandwiches and crackery snacks.

Veggie Pâté

4 medium onions, chopped
6 medium garlic cloves, minced or pressed
0.5 kg sliced mushrooms
2 cups lightly toasted walnuts
2 cups lightly toasted sunflower seeds
2 cups dried green lentils
1/3 cup olive oil
3 Tablespoons balsamic vinegar
2 Tablespoons blackstrap molasses
1 Tablespoon salt
1 teaspoon fresh ground black pepper
1 teaspoon dried thyme (or 1 Tbsp. chopped fresh)
1 teaspoon dried parsley (or 1 Tbsp. chopped fresh)
1/2 teaspoon liquid smoke

(This is a very forgiving recipe. If you don't have dried green lentils, use red ones, or use dried peas, or dried garbanzos or heck, you could probably use tofu or even porridge for that matter. If you don't have walnuts or sunflower seeds, substitute with hazelnuts, pumpkin seeds, cashews or any number of other possibilities. The seasonings are suggestions, not requirements. I've put all sorts of seasonings in and it always turns out great.)

Simmer dried lentils in a few cups of water for 1 hour or until tender, drain and set aside. In the meantime, sauté onions, garlic and mushrooms in olive oil until soft. Add salt, turn the heat down a bit and allow to "sweat" a bit and also carmelize a bit on the bottom. Stir occasionally, but don't worry if things get a bit crusty in the bottom. Turn off the heat. Deglaze the bottom of the pan to extract any caramelization, adding a tablespoon or two of water if necessary. Dump in vinegar, seeds and remaining seasonings.

Combine cooked lentils with the mushroom-onion mixture in a food processor. Process until smooth. Serve as sandwich or cracker spread.

Friday, May 13, 2011

Making hard candy

Here is Sophie's system for making hard candy. Her basic recipe is from the LorAnn Oils site. They make great concentrated oils and dozens of awesome flavourings, though natural foods stores are a good source of basic essential oils as well.

Ingredients

2 cups granulated sugar
2/3 cup corn syrup (use clear or amber as desire: only colour will be affected)
3/4 cup water
5 – 15 drops of liquid food colouring
1 tsp. essential oil or other concentrated flavouring (use half as much for clove, cinnamon or peppermint oil)
For dusting: 1 cup of icing (confectioner's) sugar

Equipment:
Small to medium sized clean, heavy-base pot with heat-proof handle and lid. (Mixture will bubble up to approximately twice its initial volume, so you need to have a good bit of room to spare.)
Accurate candy thermometer (We use our laser infrared digital thermometer which works great but a decent analogue one will suffice.)
Heat-proof spatula
Molds (sprayed with light cooking oil) and lollipop sticks if desired
Dough scraper (lightly oiled)
Marble slab or other heat-proof surface (lightly oiled)
Heavy-duty scissors or kitchen snips (lightly oiled)
Pan or rubbermaid container in which to toss candies in icing sugar
Basic metal kitchen sieve
Damp cloths for quickly wiping up spills.
A source of water for rinsing hands as needed.
A well-organized workspace that will not risk a person carrying a pot full of extremely hot sticky syrup tripping over a child, a stool or a dog whilst moving to counter area to pour candy.

The beginning of the Butter Rum candies
Place granulated sugar, corn syrup and water in the pot. Stir gently just enough to dampen the sugar. Put the spatula aside and resist any temptation to stir again until mixture is done cooking. Heat on medium heat on stove until mixture starts to simmer. Put the lid on the pot and let it simmer away covered for a couple of minutes at least. The condensation on the sides of the pot will was down any lingering sugar granules and help prevent crystallization later on. Remove lid.

Monitor temperature periodically as the mixture boils. It will likely hang around 212ºF (100C) for a while until the water boils off and then beginning climbing gradually. The rate of increase may increase as the temperature increases, so be vigilant. 

A deep red for Cinnamon candies
At 260ºF (125C) add drops of liquid food colouring as desired. Just sprinkle them on the boiling syrup. Don't stir! The boiling action will mix the colour in.

As soon as the syrup hits 300ºF (150C) turn off stove and remove pot from heat. Wait for boiling to subside. Measure out your flavouring and pour on top of syrup. Use spatula to stir it in. Warning: some flavourings, especially the natural oils, let off a lot of harsh sinus-penetrating volatile aromatic hydrocarbons. Stand back while stirring!

Lovely shiny ribbons
Pour one to three ribbons of syrup onto your heat-proof oiled surface and then place saucepan back on stove on lowest heat to keep remaining syrup liquid. Don't touch the ribbons at first. 

Use dough scraper to fold them over on themselves once or twice. After they begin to hold a more rolled, three-dimensional shape, they are ready to start handling. 

Work quickly! Touch lightly with clean hands and keep your hands and the candy ribbons moving so as to avoid burns. We like to twist ours a dozen or so turns and then roll the twisted rods like snakes a bit between our palms to compact them. 

Snip into candy-sized lengths into icing sugar while still warm and pliable. Toss to cover with icing sugar. Repeat until all the syrup has been turned into candy. Sift off excess icing sugar.

Alternatively you can pour all your syrup onto a rimmed cookie sheet lined with lightly oiled foil, wait a couple of minutes and score your clear lake of candy into bite-sized bits with the back of a lightly oiled dinner knife. If the scores fill in, the candy is still too hot: wait a couple of minutes and repeat. Allow scored candy sheet to cool completely, then break into bits along the scoring lines.

Sophie gets three beautiful lollipops and this
many candies from a single batch
Or you can use lightly-oiled candy molds. (Not the kind made just for chocolate: they won't stand the high heat of this syrup. You need the kind intended for hard candy.) Pour. Cool. Turn out.

Candy should be stored in a cool dry area, inside something moisture-proof.

Sunday, March 20, 2011

Felafel fun

I scoffed for years at the idea of a panini press. As if we needed another counter-space-hogging specialty appliance. Pah! Chuck felt differently: he purchased them as gifts for others, and occasionally expounded on their presumed virtues. But I kept our own home free of this silliness.

Finally last Christmas I caved. We got a Cuisinart "Griddler." I rearranged things in the pantry and made enough shelf space that the darn thing could at least be put away in between uses. The kids were thrilled. Chuck was happy. I coped.

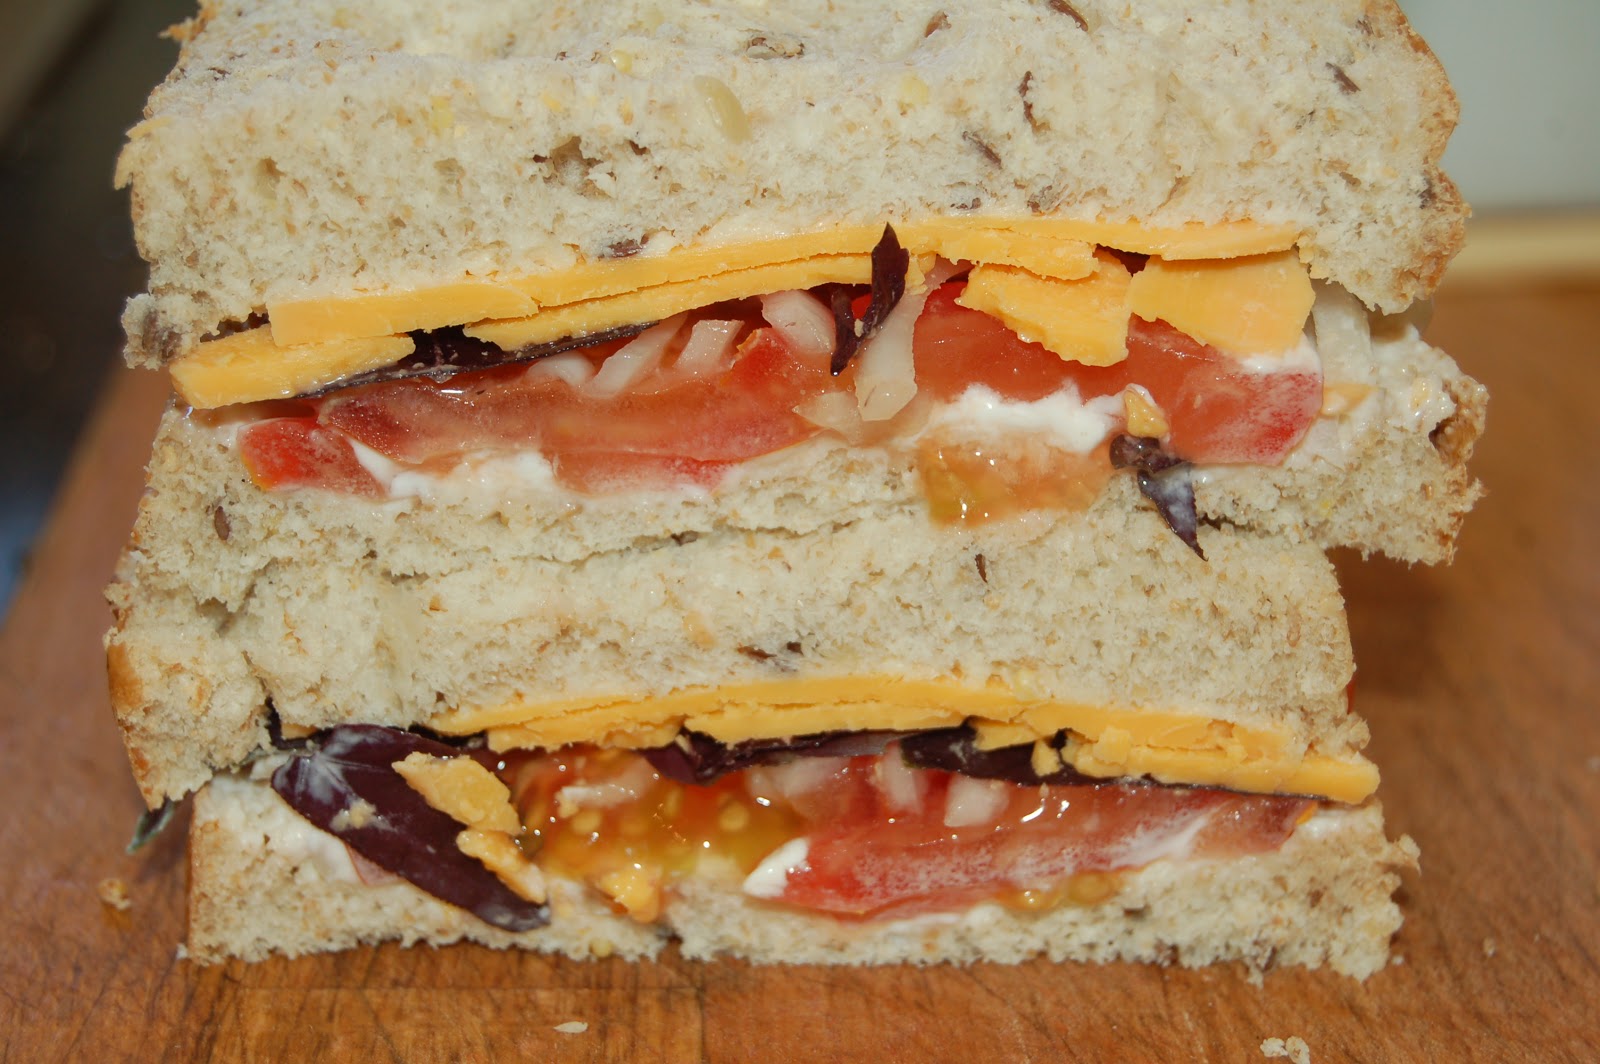
But now ... I'm a convert. I admit I love the ease of serving paninis for supper: healthy food that everyone enjoys, which can be prepared in under 20 minutes. Our favourite sandwich is fresh basil leaves (garden fresh purple basil shown, from last summer), thick slices of tomato, some sweet onion, a little mayonnaise and some cheese. Our press has the traditional ridged grill plates for the paninis, but also flat plates. And last week I discovered a wonderful use for these: felafel.

I love felafel. Except for the hassle and mess and oil of shallow-frying them. I generally make big batches, and I have to fry them a couple of dozen at a time. It takes ages to drop them in, flip each one at the right time, take them out, drain off any excess oil, heat the next bit of oil, drop in the next batch.

With the griddler, though, I just drop 15 rounded tablespoonfuls of batter onto the lower plate, close the press, wait five minutes, open it and sweep the golden yellow-brown little fellas off. Repeat, repeat, repeat. While making and enjoying a cup of tea. So easy! And totally low-fat too.

Felafel (adapted from the Moosewood Cookbook)

1 1/2 cups dried chick peas

3/4 cup chopped onion
4 large cloves of garlic

2 tsp. cumin
1 tsp. turmeric
1/8 tsp. cayenne
1 tsp. salt
1/2 cup chopped fresh parsley
2 Tbsp. fresh squeezed lemon juice
1/3 cup rice or wheat flour
Approx. 3 Tbsp. water

Soak the chick peas overnight. The next day bring to a boil, then simmer 30 minutes and drain. Once cool enough, transfer to food processor. Add onion and garlic. Process until the consistency of very chunky peanut butter. Transfer to a bowl and add the salt, spices, parsley, lemon juice and flour. Add enough water to make a playdough-like consistency that holds together easily. Use tablespoons of this mixture and form into balls with your hands, then flatten slightly. Cook for 3-5 minutes on a flat grill-press at medium heat. Consume immediately in pita pockets with raita, olives, tomatoes and cucumber. Or cool, then store in the fridge for future meals or snacks.

Yup, love the panini press.

Friday, November 12, 2010

The magic oven

The new thermometer is making easy work of the bread oven. In the past I have over-fired the oven. I've burned it too long and with too much wood, so that is has got too hot. This has meant that pizzas are done in 5 minutes and over-done in 5 minutes and 28 seconds. Which is a fairly critical difference since it takes at least 28 seconds for me to get the door off and fish out the pan.

Today I tried out the thermometer for the first time. I fired the oven with some kindling, a few two-inch diameter small logs and two average sized pieces of birch firewood, burning for a total of about an hour and three-quarters. Then I raked out any of the bigger coals and pushed the small ones to the edge of the oven (thanks for the tip, Jacinda!) and threw in the first pizza.

The first pizza went in at 350ºC (650ºF) and took about 8 minutes.
The next pizza went in at 270ºC (520ºF) and took about 11 minutes.
The bread went in at around 230ºC (450ºF) and took about 25 minutes.
The lentil dal bake went in at around 180ºC (350ºF) and I'll leave it for three or four hours.

Today's breads are a whole wheat and khorasan blended yogourt bread on the right and a honey-garlic wheat bread on the left. I'm getting very adventurous with my bread-making recipes these days, just winging things with a rough formula of:

1 cup liquid
1 Tbsp. oil or butter
1 Tbsp. sugary stuff
1 tsp. salt, and
1 tsp. yeast

per loaf of bread, plus some combination of flours to make a dough that feels right when kneaded. I supplement with a bit of gluten flour if I'm using predominantly low-gluten flours (i.e. spelt, corn meal, oats or khorasan). And I make other adjustments, too, sometimes adding an egg or two, or using cottage cheese as a liquid and bumping up the volume, or increasing the sweetener, or adding seeds or herbs or nuts or dried fruit. I'm either developing some skill at this, or have been lucky recently, or else (more than likely) the oven enacts some sort of magic, because my loaves have been turning out beautifully almost no matter what oddities I throw into the mixing bowl.

We've just received the first half of our grain CSA order, so I am inspired on all fronts these days. The khorasan (a.k.a. Kamut®) is new to the CSA this year, our bin of hard spring wheat has been replenished, and I'm looking forward to getting more spelt and some heritage Canadian Red Fife wheat when the second half of our share rolls in in a couple of weeks.

Saturday, October 23, 2010

The morning after baking day

Another dozen rolls and another loaf of bread are already in the freezer. The pizza is long gone. The beans, still warm, are waiting to go in the freezer.

I managed the baking times a little better this time. Except for the pizza, which got a bit charred just at the edge, the crusts were all perfect. And it turns out that the time required to eat a pizza dinner is the perfect time to allow the oven to cool down for the first loaves of bread.

Vegetarian Baked Beans

3 cups white pea beans, soaked overnight
1 large onion, chopped
1 tart apple, chopped
1 1/2 tsp. salt
2 Tbsp. brown sugar
1/4 cup dark molasses
1/4 cup tomato paste or ketchup
2 Tbsp. balsamic vinegar
1/2 tsp. red pepper flakes (to taste)
1/2 tsp. freshly ground black pepper
1 tsp. curry powder


Cover beans in water and bring to a boil. Simmer for half an hour. In the meantime, prepare other ingredients and dump into a heavy baking dish with a lid. Add simmered beans and stir. Add enough fresh water to bring the level up to the top of the beans. Cover pot and place in a slow oven (275ºF) for 4-6 hours. Add a bit of water as necessary. An hour before serving, mash a few of the beans and stir in. Add more water if necessary, or uncover if too watery. Time and temperature are very flexible. You can start the beans at 9 a.m. and set the temperature a bit lower and leave them all day, or you can start at 2 pm and bump the temperature up a bit hotter. Or you can (apparently) put them in a fairly hot thermal mass oven and leave them overnight as the temperature gradually cools.

(About the seasonings: I really just wing these. I always use onion, though sometimes I pitch in more than one. I always use about a third of a cup total of something brown and sweet, a similar quantity of something tomato-based, a bit of some kind of vinegar, plus salt and pepper. The rest is just by guess and by gosh. The curry powder is a nice touch in traditional baked beans and a teaspoon gives just a subtle flavour. You can triple the apples and triple the curry powder to make a real curry-flavoured pot which is nice for variety sometimes. Sometimes I'll pitch in some soy-based browning, or some vegetarian Worcestershire sauce, or some liquid smoke, or use maple syrup instead of molasses and brown sugar. It is quite fun to experiment.)

Serve with fresh-baked bread or rolls.

Left-over baked beans can be mashed a bit more and stored in the fridge to be used as a savory vegetarian sandwich spread. Beans also freeze well.

Thursday, August 19, 2010

In our outdoor oven

... we will bake things like this. Not yet, mind you -- it'll take at least a few weeks to finish and cure. But eventually this is the sort of thing we hope to plunge into its fiery cave. Flatbread glazed with olive oil, topped with fresh basil and tomato slices, garlic, avocado and a little mozzarella, drizzled with a teaspoon of balsamic vinegar.

We are on a huge fresh basil kick here. How good is fresh basil in a simple tomato-and-mayo sandwich? Or in a grilled cheese? Especially a grilled cheese made on the herbed French loaves Noah has been baking for us lately. Hopefully he'll keep up his bread-baking once we have the outdoor oven working.

Right after the flatbread/pizzas are baked we will insert Sophie's cinnamon buns. She's really good at these! They're as decadent as anything, especially once the butter-cream-cheese frosting is applied, but they are definitely worth the guilt.

Cinnamon Buns

For the dough:
1 cup warm milk
2 eggs
1/3 cup softened butter
1 tsp. salt
1/2 cup granulated sugar
1 Tbsp. yeast
4 1/2 cups flour

For the filling:
1 cup brown sugar
2 1/2 Tbsp. ground cinnamon
A little extra butter

For the frosting:
3 oz. (100 g) softened cream cheese
1/4 cup softened butter
1 1/2 cup confectioners sugar
1/2 tsp. vanilla
1/8 tsp. salt

Mix first five dough ingredients together in a large bowl. Pitch in yeast and stir. Add flour a cup at a time, stirring with a wooden spoon or eventually kneading with your hands. Knead thoroughly as you get to the last half cup of flour. You may need a little more or less depending on the hardness of your flour; dough should be just barely not sticky, and not stiff.

Leave dough covered in a warm place to rise until doubled. Punch down and allow to rise a second time.

Turn out on a lightly floured surface and allow to rest for 10 minutes. Meanwhile, in a small bowl mix together cinnamon and brown sugar for filling.

Now roll the dough out to make a rectangle approximately 16 by 21 inches. Lightly spread softened butter over the surface. Sprinkle evenly with cinnamon/sugar filling. Roll up dough and pinch seam. Lightly butter the outside of the log. Cut into 12 slices. Place rolls in a lightly greased 9x13 baking pan, cover and let rise until nearly doubled -- about 30 minutes.

Bake at 400ºF for about 15 minutes, or until golden brown. While rolls are baking, make the frosting. Beat together butter and cream cheese, add vanilla and salt, then mix in confectioners sugar.

Allow rolls to cool down a bit on a rack, then spread frosting on warm rolls. Serve!

Sunday, August 15, 2010

Sushi night

During the summers we don't get to a grocery store very often. The last time I did a true grocery shopping was a week and a half before SVI started ... almost four weeks ago. We have been eking things out by shopping at the sparse Friday Market, making occasional convenience store purchases, and raiding our basement pantry for staples. Creativity has been called for.

Today I managed to roll out a sushi dinner. Some of the sushi was traditional nori-wrapped rice and veggies. Some of it was tomagoyaki-wrapped rice and veggies. And the coup de grace was the green pea patties. Everybody here likes these, which is quite a feat in a family of picky eaters.

Tomagoyaki

1 large egg
1 Tbsp. water
1 tsp. soy sauce
1/2 tsp. sugar

Whisk together thoroughly. In a cool large oiled skillet pour the mixture in and use a spatula or spoon to encourage the puddle to assume a rectangular shape in the same proportions of a piece of sushi nori. Now increase the heat beneath the skillet to cook the mixture until firm. Remove from heat, allow to cool. The rectangle can now be treated (gently!) like a piece of nori and used to roll up rice and fillings, then sliced into 6 pieces.

Alternatively, tomagoyaki can be folded or rolled up upon itself with no fillings and served as a snack food. We were into bento-style lunches for a while and cold tomagoyaki is a good protein-laden lunch box finger food.

Green Pea Patties

2-3 cups of frozen peas
1 Tbsp. tahini
1 tsp. black olives
2 Tbsp. flour
1 tsp. chopped fresh rosemary
black pepper to taste
1 Tbsp. dried onion flakes
1 tsp. dried garlic flakes
3 Tbsp. chia seeds (or poppy or sesame)
1/2 tsp. salt
Oil for frying

Add a bit of water to the frozen peas and bring to a boil in a saucepan. Simmer 5 minutes. Drain.

In a food processor add the cooked peas to the next five ingredients. Purée.

Combine onion and garlic flakes with chia seeds and salt on a small plate. Place a generous tablespoon of pea mixture on top of the coating mixture. Flatten slightly with a fork and flip to coat the other side in seasonings as well. Fry in a small drizzle of oil on both sides until golden brown. Lovely hot or cold. Great in lunches too. Makes a dozen.

Both of these recipes were inspired by similar ones at justbento.com.

Sunday, July 11, 2010

Hard cheese experiment

We get nice organic milk from a friend's cow. The kids don't much like the taste of milk that hasn't come through a factory (whatever!), so I try to do other things with it. We've made kefir, yogurt, panir and mozzarella cheese. Sophie is actually our family mozza expert, having been taught by her friend and brought the skill home.

Today, with a gallon of nice whole milk to use up, we opted to try a hard cheese, in this case a Monterey Jack recipe from Ricki the Cheese Queen. We started by pasteurizing the milk, bringing it to 145ºF for half an hour. Then, once it cooled to the lukewarm range enjoyed by mesophilic starter culture, we pitched in our culture and half a rennet tablet. Then we kept the milk lukewarm and waited half an hour or so.

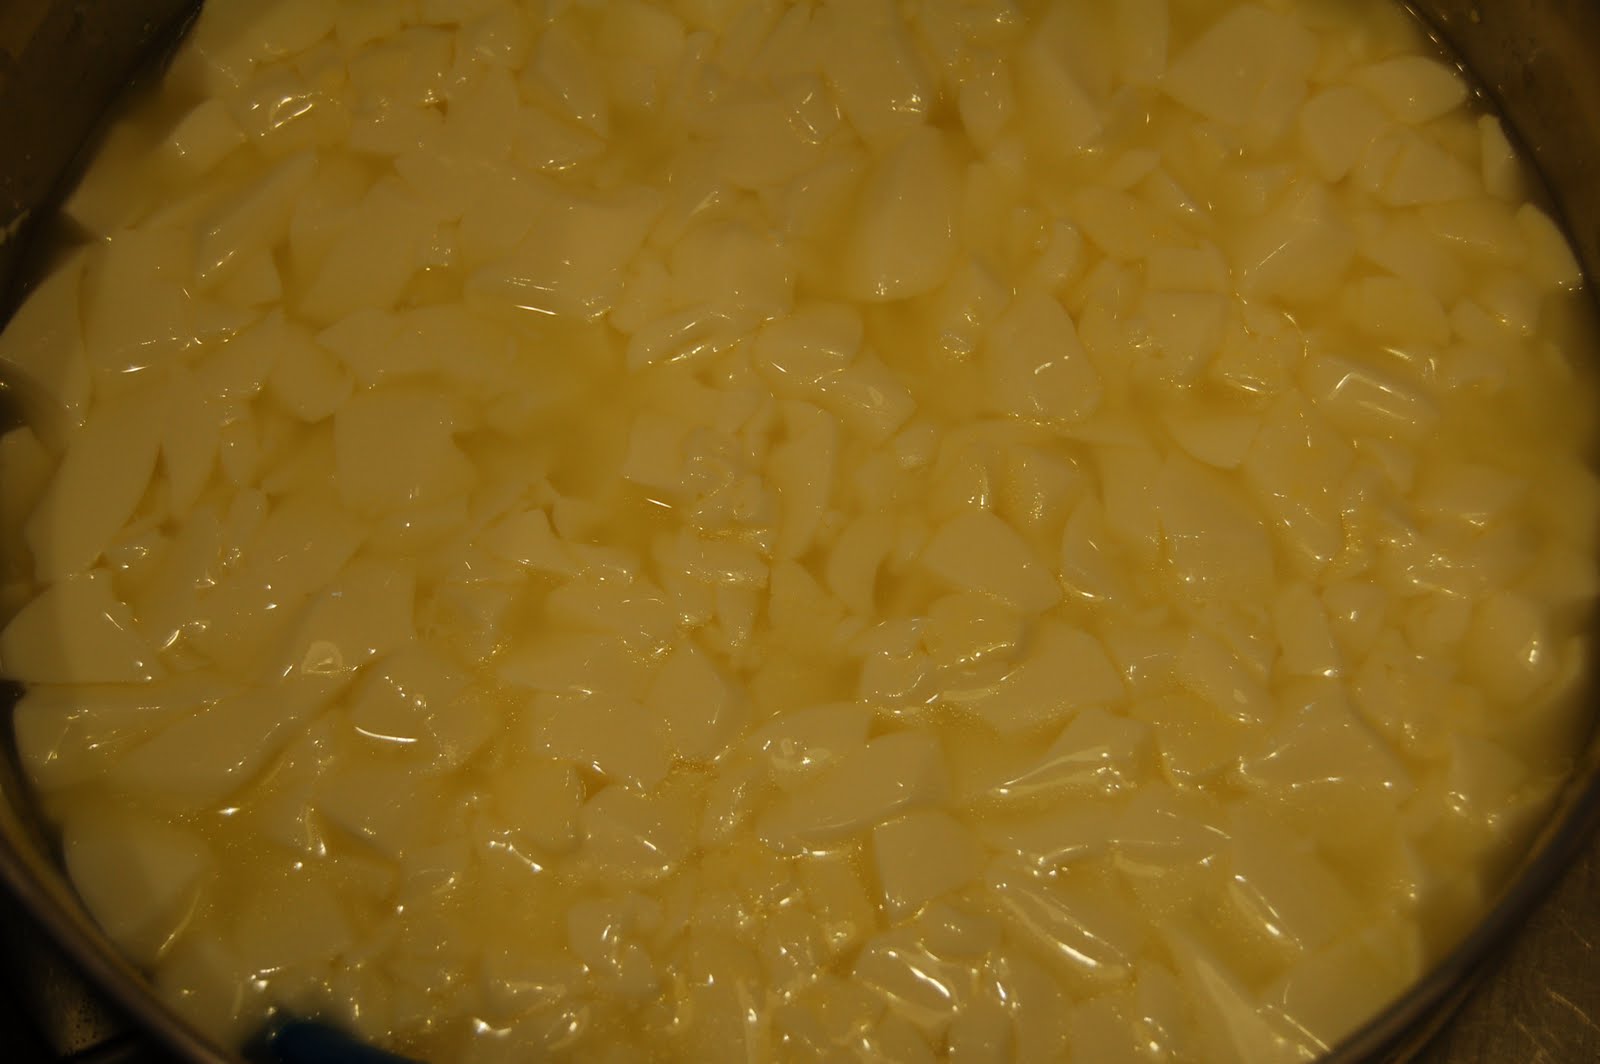
At that point it had curdled nicely. Still maintaining the even 90ºF temperature, we cut the curds. They were more like yogourt in consistency than cheese curds, but it's like they're born with little muscles that instinctively contract. We warmed this liquidy mess of lumpies up to 100ºF gradually, stirring every once in a while and gradually the muscular little curds pulled into themselves, contracting and squeezing out more and more of the whey.

After an hour or two we had begun to see how a four-litre jug of milk turns into nothing more than 400-odd grams of cheese. The curds were much smaller and more rubbery and there was a ton of whey.

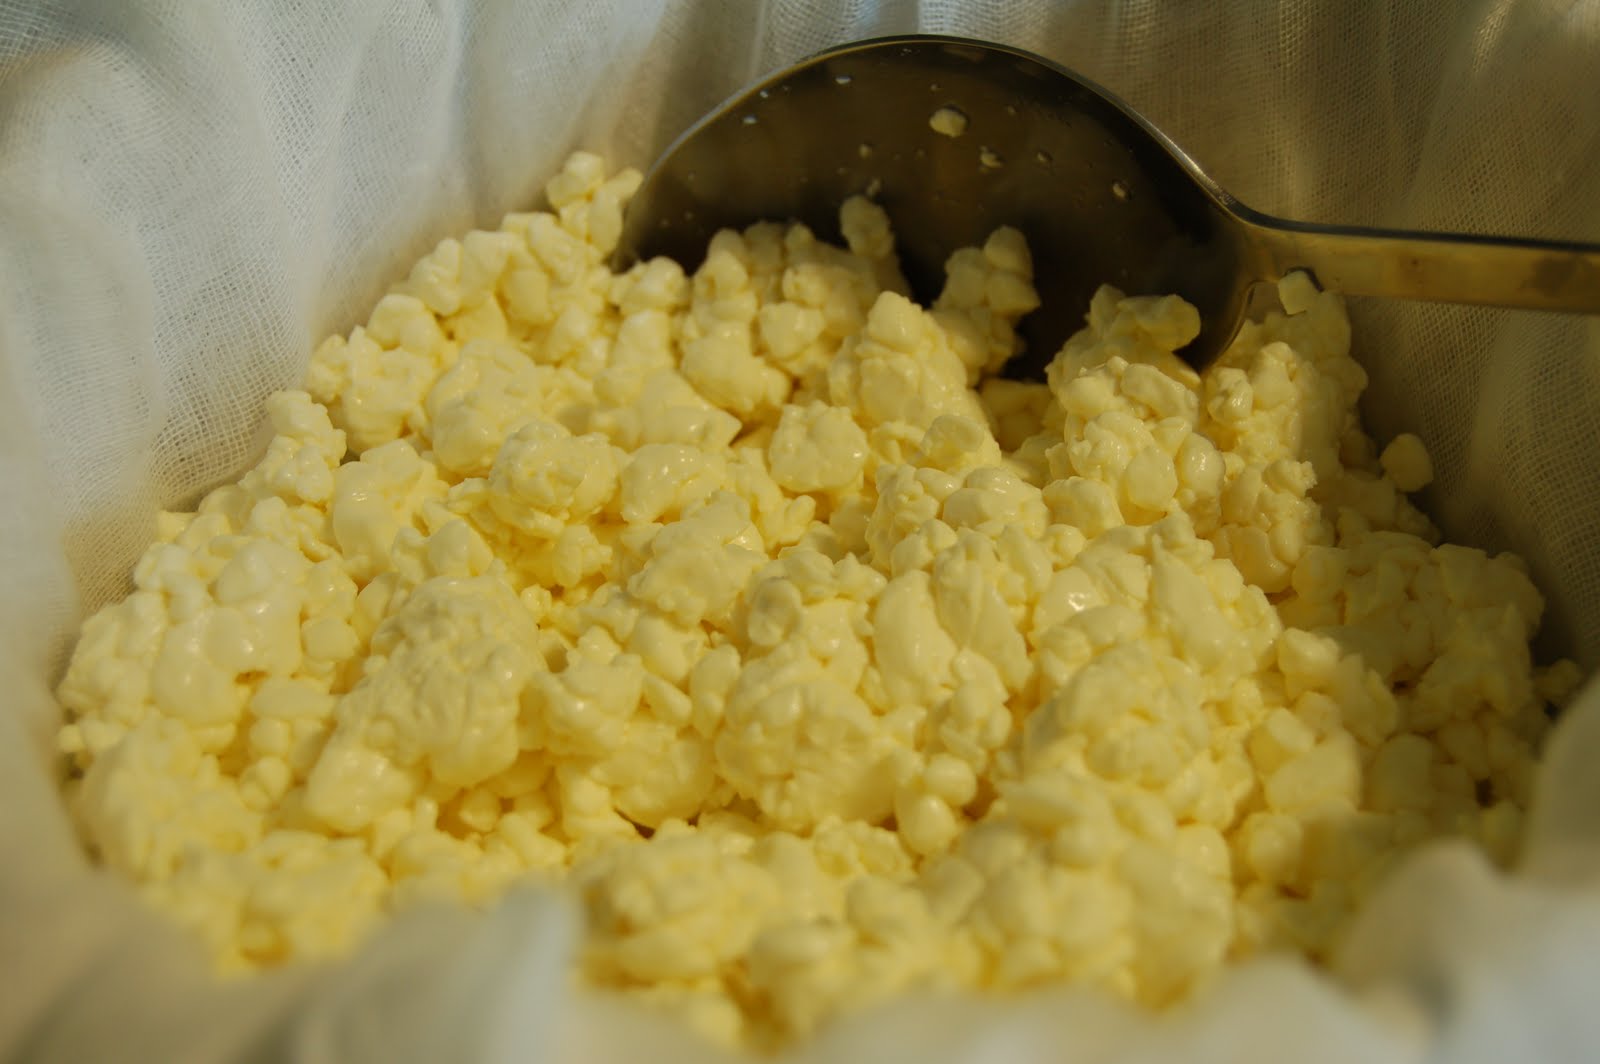
At this point we decanted off the whey by pouring the whole business into a cheesecloth-lined colander.

This is what the curds looked like without their bath of whey. Finally we could let the curds cool down. We salted the curds, mixing the salt in with a spoon, or our hands.


Then we wrapped the curds as tidily as possible in the cheesecloth, placed it in the mould and added weight on top. We started with a pound for 15 minutes, then flipped the cheese over and bumped up the weight to four pounds overnight.

The next morning we unweighted and unwrapped the cheese and began letting it dry for a couple of days. After that we'll wax it and then we'll age it for at least a couple of months in a cool area in the basement.
Here's where some of the whey went. Our dog loves this stuff! (As an aside, this action shot revealed a lot more tongue than we thought she possessed. How does that thing fit inside her mouth?) Unfortunately due to the lactose, it's a little tough on her digestive tract, so she's being rationed. Whey is also great for bread which is perhaps where the remainder will go.

Monday, June 21, 2010

Fallow days

We're enjoying a well-deserved few fallow days. Besides the bike rides, runs and swimming days, we're attending to a few lingering jobs at home.

We finally finished disassembling the play structure. This involved sawing timbers away from seized bolts and digging out the four concrete footings. Now it only remains to transport the sandbox sand to the garden and fill the hole in with dirt from the mound left over from when we built the deck. I began this job today and it turned into an exercise in paleontology. There were several dinosaurs (plus a bull and a much-cherished rooster) discovered deep in the sand.

When I took some of the sand over to the compost pile, where we mix up soil for raised garden beds, I noticed that the manure pile was full of red wigglers. So we donned rubber gloves and picked through the pile until we had half a pound of the lively little guys, enough to start back at vermicomposting. We had a worm bin for a couple of years, until our former dog overturned it in the baking sun and chawed down on the container.

So we started our worm bin again. The theory is that by keeping the food waste in the worm bin we'll avoid attracting bears to the large open bins in the corner of the property. Those will just be for garden waste. Hopefully we can secure the worm bin and keep it close enough to the house that bears will be deterred from getting into it. Right now it is stored inside the empty rabbit hutch. You can see a few lovely red worms in the photo at left. It's almost impossible to get a good photo of them outdoors because they dive away from the light as soon as you uncover them.

In the winter I think we might be able to keep the bin in the shop, which Chuck keeps slightly heated, and keep our little friends alive that way. We've kept it in the basement in the past, but inevitably despite our best efforts to the contrary we seem to get into problems with flies. For now, outside is perfect.

Yesterday I managed to take a hand-me-down double foam mattress apart, altering the cover on the sewing machine and cutting the foam down to size, re-assembling it as a twin-sized mattress that fits Sophie's bunk beautifully. She's been complaining of being uncomfortable in her bed for years; I don't know what her problem is: we spent a perfectly good $99 on that mattress 14 years ago. Anyway, she is a happy camper now and slept way past her 6:30 am alarm this morning.

Sophie has been baking today: chocolate coffee cake I believe. Fiona has been inventing recipes for savory dips and dressings. Creativity in the kitchen is always fun. The other day we made several dozen of these Hippie Bombs (renamed; formerly Energy Balls), which have become an instant hit.

Hippie Bombs

2 cups rolled oats
2 cups sesame seeds, toasted
2 cups sunflower seeds, toasted
2 cups chocolate chips
2 cups dried cranberries
2 cups goji berries
1 cup cocoa
1/2 tsp. salt (omit if PB contains salt already)
4 cups peanut butter
1 cup honey
3 cups flaked coconut, toasted, for coating

Combine all ingredients except coconut. Mix with spoon, spatula or hands as required. Form into balls with your hands. (They can be anywhere from truffle-sized to 1/4 cup in size depending on your preference. Ours are about 25 ml in volume.) Roll in coconut. Store in airtight container between layers of waxed paper. You could easily substitute almond butter for the peanut butter, or other dried fruits like chopped dates or raisins for the ones we used. The kids are trying to convince me that to be real energy balls these need to have a chocolate-covered espresso bean at the centre, but I've not been convinced.